Quick Answer: Most I-Shift shift faults are air or signal faults, not a failed gearbox. Read the TECU fault codes first, then check supply pressure and leakage at the control housing, then test each solenoid for coil continuity and correct actuation. Replace only the failed valve, seal kit or sensor — and on a high-mileage unit, replace the control housing seal kit and piston-rod kits as a set, because a new valve on worn seals will leak again. Volgen Power supplies the solenoid valves, TECU/ECU housing, sensor kits, seal kits and piston rods listed below for AT2612D/E/F and ATO units.
Table of Contents
- How the I-Shift Shift System Works
- Symptom to Probable Cause
- Step-by-Step Diagnosis
- Electrical and Air Checks at a Glance
- Overhaul Parts Checklist
- Rebuild Sequence That Avoids a Comeback
- Common Mistakes
- Sourcing and Quality Inspection from Volgen Power
- Frequently Asked Questions
- Need the Right I-Shift Part for Your Variant?
How the I-Shift Shift System Works
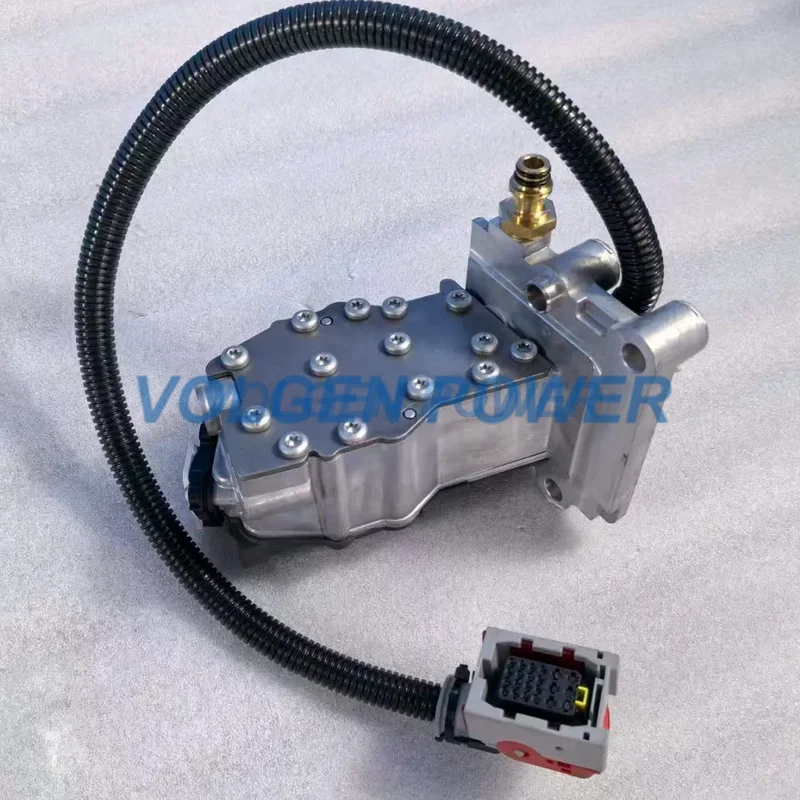
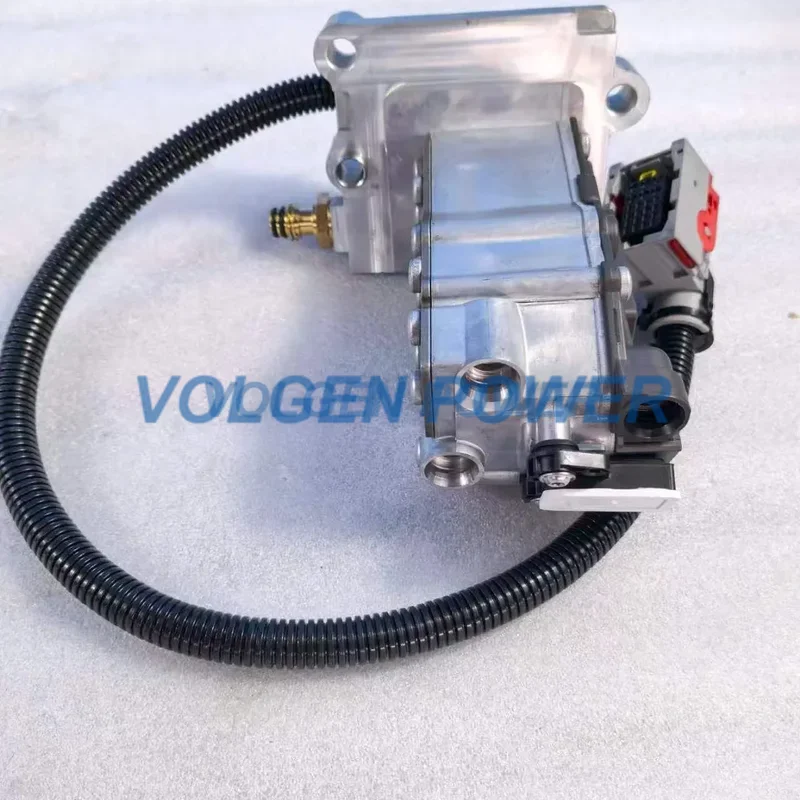
The I-Shift is an automated manual transmission. The gearbox internals are mechanical; what makes it automatic is a control layer on top: the transmission ECU (TECU) inside the control housing, a set of pneumatic solenoid valves, shift cylinders with piston rods, a range cylinder for the splitter and range sections, and a concentric clutch actuator (CCA) that operates the clutch.
The TECU decides which gear to select from vehicle speed, engine speed, throttle and driver input. It then energises solenoid valves, which send air to the relevant shift cylinder. The piston moves the shift rail, the gear engages, and a position sensor tells the TECU that the shift is complete. The clutch is released and engaged by the CCA, controlled by its own valve. Every complaint about "the gearbox not shifting" therefore has four possible layers: air supply, valve, cylinder/seal, or signal.
Symptom to Probable Cause
| Symptom | Most likely layer | First checks |
|---|---|---|
| Jumps to neutral, then recovers | Air pressure or a slow valve | Supply pressure, leak-down at the control housing, valve response time |
| Will not engage a specific gear only | Cylinder, piston rod or detent for that shift | Check the fault code, inspect that cylinder's seal kit and piston rod |
| Delayed engagement when cold | Seal hardening or moisture in the air system | Air drier, water in the housing, seal kit condition |
| Clutch slips or engages harshly | CCA or clutch PWM solenoid | Clutch valve operation, CCA stroke, calibration |
| No communication with the transmission | TECU, harness or power supply | Power, ground, CAN wiring, ECU housing condition |
| Range or splitter will not change | Range cylinder, range solenoid or speed signal | Range piston seal, valve, vehicle speed sensor |
| Oil leaking from the control housing | Seal kit, housing gasket or breather | Seal and gasket kit, housing distortion, breather blockage |
Step-by-Step Diagnosis
Step 1 — Read the fault codes before touching anything. The TECU stores codes for solenoid open/short circuits, sensor plausibility, air pressure and clutch position. A code for one valve tells you where to start; clearing codes without recording them throws away the only reliable evidence you have.
Step 2 — Check air supply and quality. Confirm the system reaches operating pressure and holds it. Drain the air tank and look for water or oil. Moisture freezes in cold weather and swells seals; oil attacks the rubber and clogs the valve seats. A drier that has not been serviced is a common root cause behind "valve" complaints.
Step 3 — Leak-test the control housing. With pressure applied and the engine off, spray a soap solution around the housing joints, solenoid bases and pipe fittings. A leak at the housing face usually means the seal and gasket kit is due, not that every valve has failed.
Step 4 — Test the solenoids electrically. Disconnect the harness and measure coil resistance and continuity, then check for a short to ground. Compare with the OEM specification for that valve — do not use a generic figure, because the clutch PWM valve and the shift valves are different components. An open circuit is a dead coil; a correct resistance with no actuation points to the TECU output or the wiring.
Step 5 — Check the harness and connectors. Look for chafed loom at the housing entry, corroded pins, and pushed-back terminals. A valve that tests good on the bench and dead in the truck is usually a connector, not a coil.
Step 6 — Verify the sensors. Compare commanded and actual values for gear position, air pressure and clutch position. A sensor that reads plausibly at rest and drops out under vibration will produce intermittent faults that never leave a hard code.
Step 7 — Exercise the actuators. Command each shift with the diagnostic tool and watch the response. A slow or partial stroke points to a sticking piston, a swollen seal or a restricted air passage — often the piston rod kit, not the valve.
Step 8 — Recalibrate after any repair. Follow the Volvo Trucks diagnostic procedure for the transmission variant. The clutch and shift positions must be re-learned after replacing a valve, sensor, piston rod or CCA. Skipping calibration is the most common reason a correctly repaired gearbox still drives badly.
Electrical and Air Checks at a Glance
| Check | Method | What a bad result means |
|---|---|---|
| Coil continuity | Ohmmeter across the valve terminals | Open circuit = failed coil; replace the valve |
| Coil resistance | Compare with OEM value for that part number | Out of range = shorted or heat-damaged coil |
| Short to ground | One probe to the terminal, one to the housing | Continuity = harness or coil insulation failure |
| Supply voltage under load | Measure at the valve connector while commanding the valve | Voltage collapse = wiring, relay or TECU output |
| Air pressure | Gauge at the test point, engine off and running | Low or falling pressure = supply, governor or leak |
| Leak-down | Soap solution at joints and solenoid bases | Bubbles = seal kit or fitting, not necessarily the valve |
| Actuator stroke | Command with the diagnostic tool, observe piston travel | Slow or partial = seal swelling, piston damage or air restriction |
Before ordering parts, this workshop clip shows how the TECU solenoid valves are accessed and repaired on an I-Shift control housing.
Overhaul Parts Checklist
The lists below follow the groups in our own I-Shift parts data. Numbers were verified against that data set and, where a product page exists, against the live site. Confirm the transmission variant (AT2612D / AT2612E / AT2612F or the ATO equivalent) before ordering, because clutch actuation changed across generations.
Solenoid valves
| OE number | Part | Notes |
|---|---|---|
| 24438826 | Euro 6 clutch PWM solenoid valve | Product page; cross-references 24325405, 24335362, 24441648, 85031432 |
| 22327072 | Clutch actuator control solenoid valve, 24 V | Cross-references 22327063, 21465235 |
| 22327063 | Clutch housing solenoid valve, 24 V | Confirm plug and bracket type against the old valve |
Control housing, TECU and sensors
| OE number | Part | Notes |
|---|---|---|
| 21244590 | Control housing upper casing / gearbox ECU | Product page; cross-references 21571890, 22106416, 22780686; F-generation housing 24593613 |
| 21068286 | Pressure sensor control unit repair kit | Interchanges with 20761735; cross-reference 7421068286 |
| 20562642 | Gear position / distance sensor repair kit | Cross-references 20562103, 20583477, 20720686 |
| 22242765 | Gearbox air pressure sensor | Cross-reference 7422242765 |
| 3197871 | Gearbox pressure / position switch sensor | Cross-references 22194568, 22354201 |
Control housing seals and cylinder cover kits
| OE number | Part | Notes |
|---|---|---|
| 20562630 | Control housing seal and gasket kit, full set | Cross-reference 7420562630; fit as a set when the housing is opened |
| 20562631 | Splitter cylinder cover repair kit | Cross-reference 7420562631 |
| 20562633 | 1st / reverse cylinder cover repair kit | Product page; cross-reference 7420562633 |
| 20562635 | 2nd / 3rd cylinder cover repair kit | Product page; cross-reference 7420562635 |
| 20562636 | Range cylinder cover kit | Cross-reference 7420562636 |
| 20562629 | Detent plunger repair kit | Product page; cross-reference 7420562629 |
Piston rods, clutch actuators and countershaft brake
| OE number | Part | Notes |
|---|---|---|
| 21302091 | Control housing piston rod, 2nd / 3rd | Cross-references 21786063, 20562105, 7421302091 |
| 21302092 | Control housing piston rod, 1st / reverse | Cross-references 20562107, 7421302092 |
| 21786063 | Control housing piston rod, splitter / main cylinder | Cross-reference 7421302091; confirm against the cylinder it serves |
| 20562111 | Range selector piston rod | Product page; cross-references 1521956, 7420562111 |
| 22429963 | Concentric clutch actuator (CCA), C/D generation | Cross-references 21465235, 21580956; F-generation 23417523 |
| 23867775 | Clutch release actuator, E/F generation | Cross-references 24602826, 24604882, 24679905 |
| 24211409 | Clutch release actuator, E/F generation | Same cross-reference group as 23867775 |
| 21666546 | Countershaft brake disc kit, C/D line | Cross-references 8172818, 21054210 |
Rebuild Sequence That Avoids a Comeback
- Clean the housing and blow out every air passage before fitting new seals; debris under a new gasket creates the next leak.
- Fit the full seal and gasket kit whenever the housing is opened, even if only one valve failed.
- Replace piston rods and their seals together; a new seal on a scored rod will not hold.
- Lubricate seals with the specified assembly grease, not engine oil.
- Torque the housing in the specified sequence to avoid distorting the sealing face.
- Refill with the correct oil, check level, then calibrate clutch and shift positions with the diagnostic tool.
- Road-test through every gear, including range and splitter changes, before handing the truck back.
Common Mistakes
- Replacing all solenoids because one code appeared — the TECU and wiring are often the real fault.
- Fitting a valve without checking supply pressure; a low-pressure system mimics a dead valve.
- Skipping calibration after a repair, then blaming the new part.
- Re-using the old seal kit on a housing that has been opened twice.
- Ignoring water in the air system, which destroys the new valves the same way it destroyed the old ones.
Sourcing and Quality Inspection from Volgen Power
Volgen Power supplies I-Shift control and clutch components from the Shiyan commercial vehicle cluster in Hubei, where the same suppliers serve the aftermarket for European truck transmissions. The parts that decide whether a repair lasts are the seals, the solenoid coils and the sensor calibration, so our inspection routine focuses there:
- Number verification. Every part is checked against the OE number and cross-reference list before it is packed, and the batch is recorded against the shipment.
- Coil and function test. Solenoid valves are checked for coil continuity and actuation, not only for appearance.
- Seal material. Seal kits are checked for the correct rubber compound; a hard or undersized O-ring leaks from the first cold start.
- Housing and sensor fit. ECU housings and sensors are checked for connector type and mounting pattern against the variant.
- VCI and shock packing. Electronics are bagged with VCI and packed to survive sea freight; a corroded connector is a rejected shipment.
- Traceability. The batch record links the part to its supplier lot so a claim can be traced to a batch, not to a guess.
Related reading: Volvo transmission parts range · 24438826 clutch PWM solenoid valve · 21244590 gearbox ECU housing
Frequently Asked Questions
How do I know which I-Shift solenoid valve has failed?
Start with the TECU fault code, then confirm with a coil continuity and resistance test on the valve named by the code. Check supply voltage at the connector while commanding the valve; a good coil with no voltage is a wiring or TECU problem, not a valve problem.
Can I replace one solenoid without opening the control housing?
On most I-Shift units the valves sit on the housing and can be changed individually, but any time the housing is opened the full seal and gasket kit should be renewed. Fitting a valve onto old seals is the most common cause of a repeat leak.
Why does my I-Shift jump to neutral?
Usually air pressure or a slow valve response rather than a mechanical failure. Check supply pressure and leak-down at the control housing first, then the valve named by the fault code. Moisture in the air system makes the fault worse when cold.
Do I need calibration after replacing a solenoid valve?
Yes for clutch-related valves and any repair that changes actuator position; a shift-position relearn is cheap and prevents a comeback. Follow the diagnostic tool procedure for the transmission variant.
What is the difference between 22429963 and 23867775?
Both are concentric clutch actuators, but 22429963 covers the earlier C/D generation while 23867775 and 24211409 cover the later E/F generation. Check the transmission variant and the old actuator number before ordering.
Need the Right I-Shift Part for Your Variant?
Send the transmission variant (AT2612D/E/F or ATO), the old part number and a photo of the control housing. We will confirm the correct valve, seal kit or actuator, quote the kit and tell you if a calibration is required after fitting.
WhatsApp our parts desk: +86 188 7263 0128 — include transmission variant, part number and quantity. Or browse the Volvo transmission parts range.